|
Strap/ Armor Mounting Material
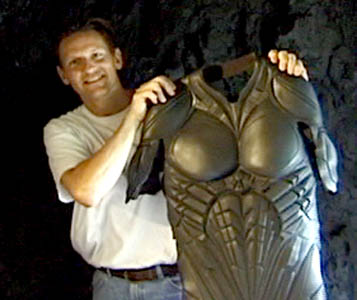
Why ruin a perfectly good and probably expensive costume undersuit with perminently gluing armor to it when there is a much better way? Not only can you use different undersuits for different needs and temperatures but you can collect an endless supply of different costume hero armor designs and muscle skins to mount over your undersuit to create an infinite selection of costumes to enjoy through the years and always meet your mood and needs for each individual event you attend. Mix and match legs, arms, chests, crotches, knee caps, belts capes gloves, boots and whatever you like. I am going to show you how by maximizing the benefits of straps and removable interchangable costume facades. We start by good strapping and it is easy so follow along with me and be done in under an hour under most circumstances. You'll be an expert after only one costume and if you make a mistake you can corect it if you are careful.
|
|
|
|
 |
|
 |
|
|
|
 |
|
|
|
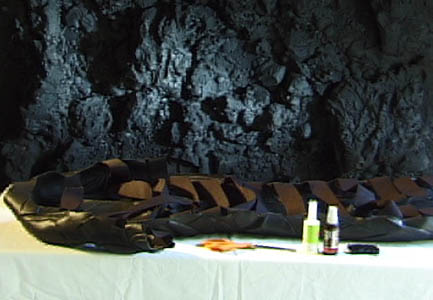
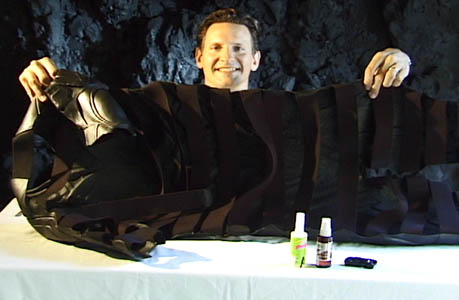
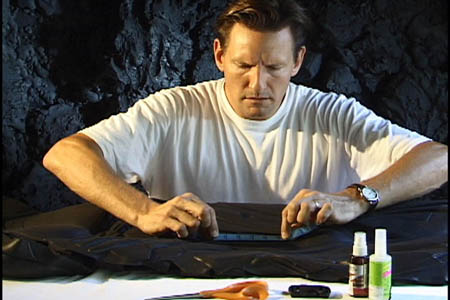
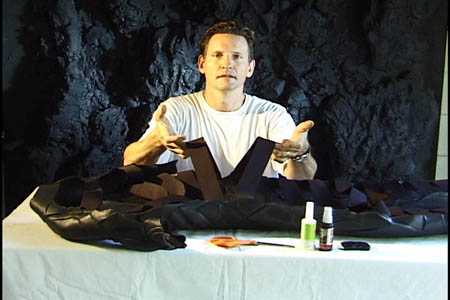
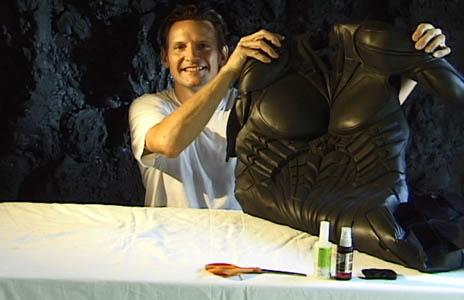
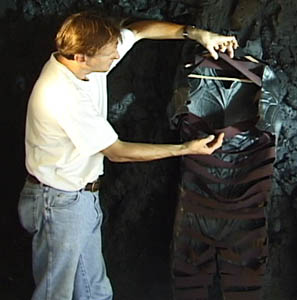
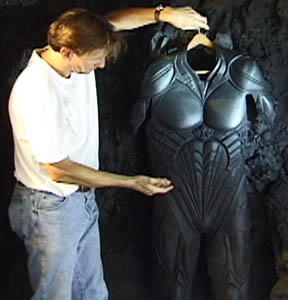
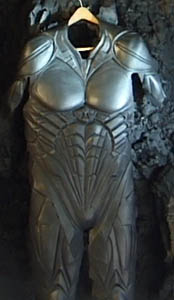
Prepare a nice flat clean work space and get your materials and costume facade ready. A nce cool environment like a bat cave always makes a fine choice for costuming creations.
|
|
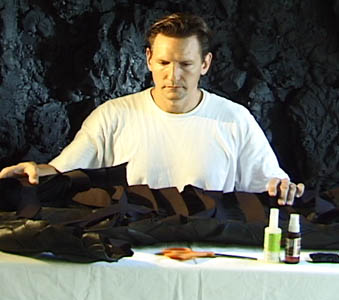
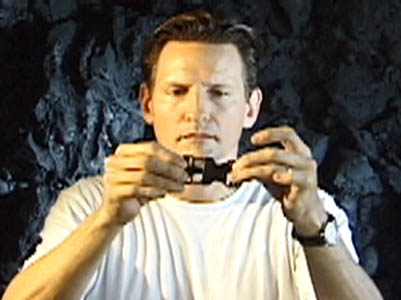
Hi, I am Paul Roberts. Some of you know me as artsee1. I am big into art and costuming is one of the areas I like to use my art experience and creativiy with. With the advent of me applying my art to hero costumes 15 years ago, when nothing was avaialable otherwise, my life quickly changed as others arounnd the world expressed to me the same interest in doing the things I do. I find that it is more fun doing what you are interested in and helping others than just doing what someone else tells you to do so here I am ready to help others to have the abiltity to have the type of fun and unforgettable unique costuming experiences that I have had for the past 15 years of doing this.
|
|
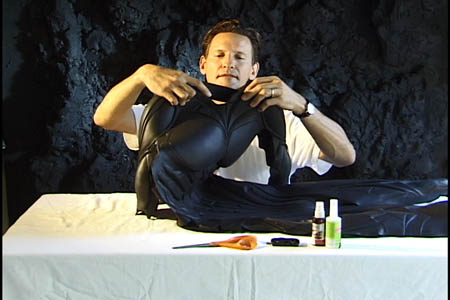
For this tutorial I have a mostly completed strapping job in front of me because every step is practically the same anyway and you just repeat it over and over until you are done. If you do a little planning and measuring as you go you will have your muscle or armor hero facade custum sized for you in about an hour under most circumstances
|
|
|
|
 |
|
 |
|
 |
|
|
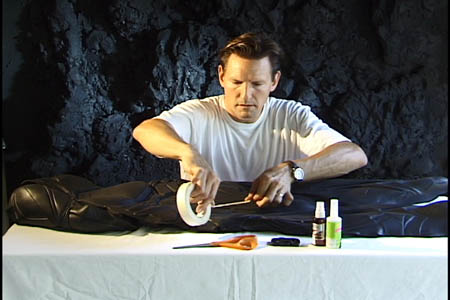
The best material available for this strapping can be found at your local fabric store. You will need a large roll of 2 inch Elastic strap in your choice of color. Other things will work but the flexibility of this material will make your costumeing experience much more comfortable and allow for ease of getting in and out of your costume. Plus the flexibility helps elliminate stress points and the glued straps will not want to pull away as easily from their mounts while the costume is in use.
|
|
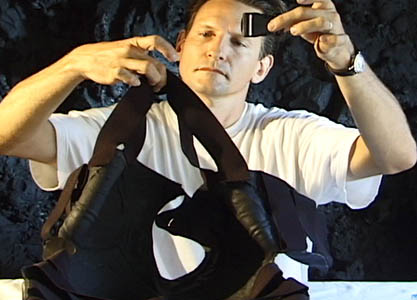
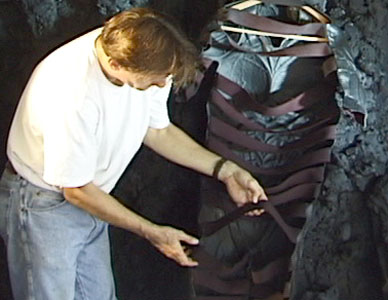
When you are done your goal is to have so many attachment points and straps that no matter how you move your front armor or muscle facade will always stay in place throughout your costuming experience and if you really plan and execute your attachment point well you will have minimal buckling and wrinkles resulting in a more believable armor or muscle look and allowing for the suspention of disbelief that you are indeed a real superhero for a day.
|
|
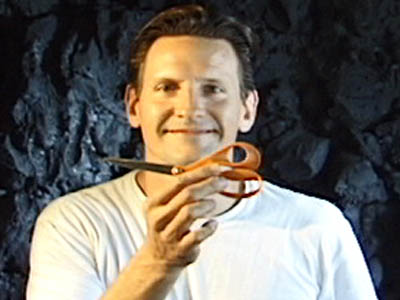
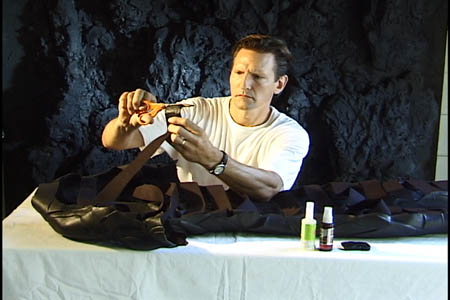
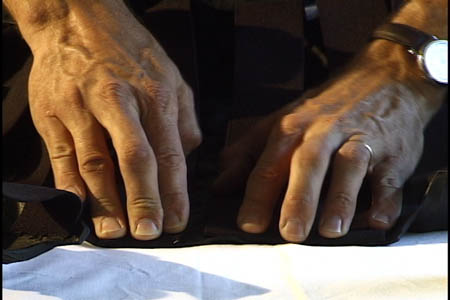
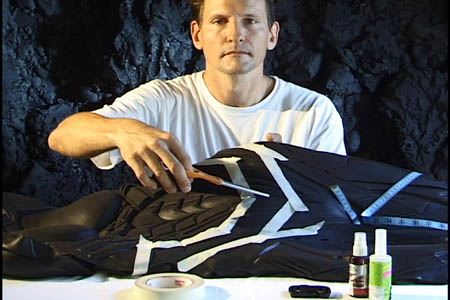
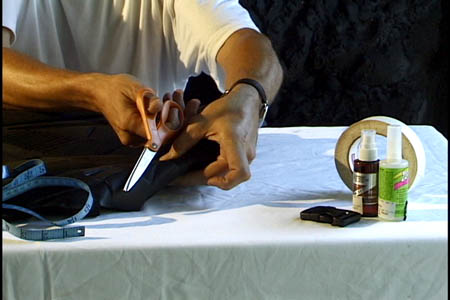
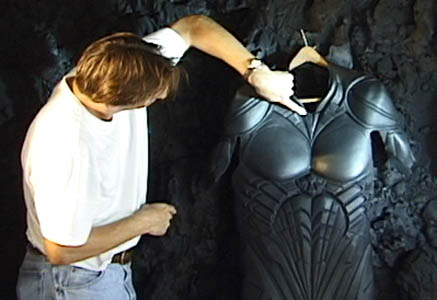
Cut the straps with a handy pair of fisker sewing scissors which are a must for all kinds of costuming jobs. including more careful or deliberate alterations of the shape of your armor facade edges as well.
|
|
|
|
 |
|
 |
|
 |
|
|
|
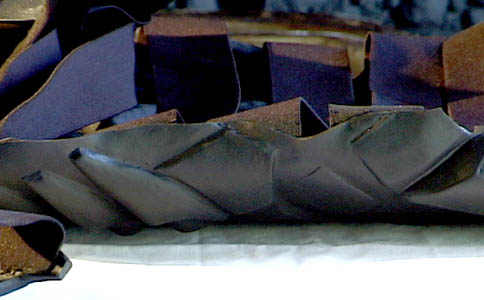
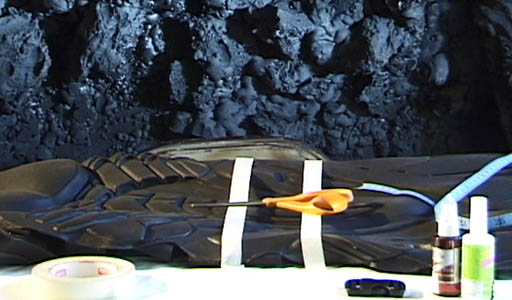
Cut the straps so that they will have at least an inch to bend around under and attach with glue to the armor piece each time you add a strap. 2 or three inches may be better. We want to create large attachment points because they are stress point and we do not want them coming loose and ruining your costume experince by looking like you are coming unglued. That just doesn't happen to superheros.
|
|
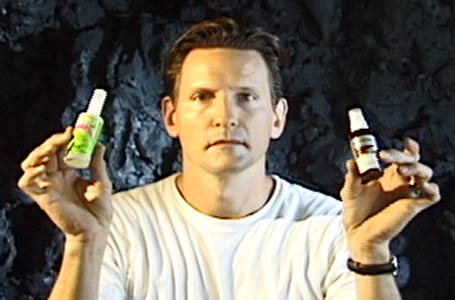
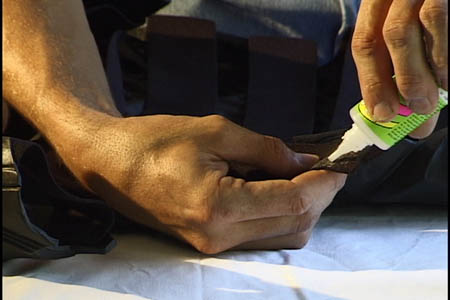
Your best friend forever. Do not even attempt to work on a project of any type without having this near by or you will find, well the whole experience will just likely blow. It's one of those things that makes you wonder what they ever did without it. Zap-a-Gap with kicker or plain old superglue actually will be fine. I really didn't even use the kicker much because the latex and straps love the stuff and just eat it up
|
|
This part is not neccesary, but I would advise the use of buckles in critcal areas to allow for ease of putting on and taking off and not stressing the attachment points more than needed as you stretch the straps to get it onand off each time you use it. They can get costly but I would advise needing no more than 5 - 6. Fo my first time I did it with out but it is a pain to get the armor on and off and we all want costuming to be fun right?
|
|
|
|
 |
|
 |
|
 |
|
|
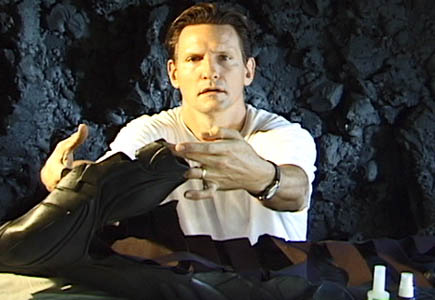
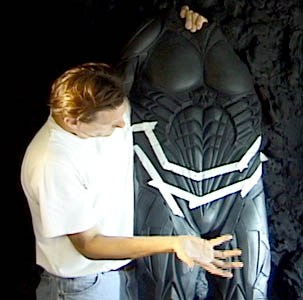
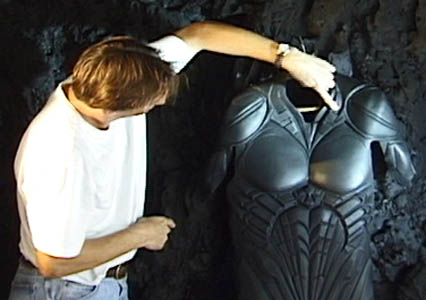
Simply apply glue in a sqaure inch area at a time onto the strap and bend it around underneath to mount on to armor. Hav e the edge of the glue about meet up witht edge of the facade armor piece. Be neat. Shoot for having it not come all the way to the edge and come back for more later on a second pass to touch it up and add more strength.
|
|
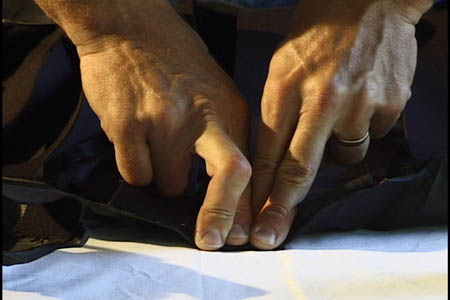
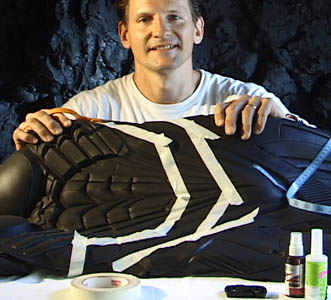
Do one strap end at a time and simply hold down forcfully with a few fingers for a few seconds each and they will set up and hold almost intantly. If you get it wrong this would be a good time to take it back off and readjust. You might have to tear the latex to get it off it is such a good adheasion. Do not add more glue than you need till you know you have it right. You might even want to wait till you try it on to decisde for sure and finalize gluing.
|
|
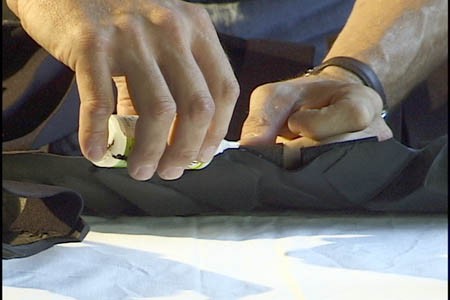
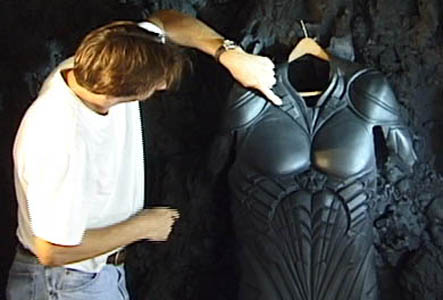
When you know you have it like you want it add more glue to the edges and secure a nice flat and even stress point on all straps where the armor joins with each strap. This will help with strength and if you place the straps neatly and think about where you are placing them it will help to keep any facade wrinkleing and buckleing to a minimum.
|
|
|
|
 |
|
 |
|
 |
|
|
Again hold the hole thing dwon tightly each time as the glue sets ups. you want it to be forced into the latex and the cavities in the strap amterial for a good bond. Now the you have the initial palcement of these straps in place you may add the additional glue a few straps at a time and speed up your progress. You can even spritz the kick on them at this point as you do them to speed the set up of the glue.
|
|
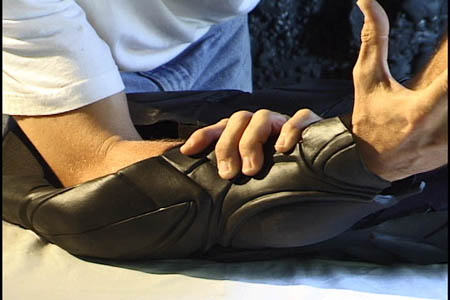
Check your work as you go because the last thing you want to do is rip these straps off when they are doouble glued and risk damaging the latex piece beyond needlessly.
|
|
Check and pull each mount individually and verify the stress points are flat and spead over a good few inches and everything is nice and attached.
|
|
|
|
 |
|
 |
|
 |
|
|
|
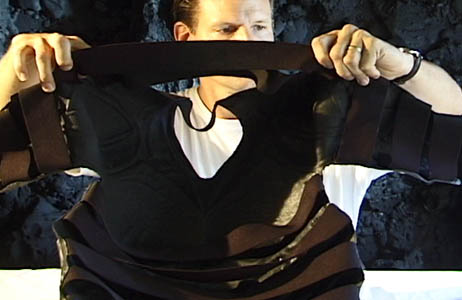
Remeber to add extra support for the top so it will sttay up and not want to slip off your shoulders and. Keep your straps separated at the upper shoulder areas because this is where you are most likely going to want to step into to a full frontal piece.
|
|
It would be wise to add buckles on these top areas so that once you step into the whole strapping aperatus and place your arms in you can simply buckle the final shoulder areas or whereever you decide to add buckels for ease of use so that you will not have to become a contortionist to get in and out of the straps each time you use our suit.
|
|
Buckels such as these are commanly available at the same types of fabric and crafts stores that you will find the elastic strapping material. You can do this with 1 or 2 inch straps and buckles but I recomment 2 inch if you can get it. You may have to have the store special order that size or get it on line from an internet supplier. Make sure you allow extra strapping material on each side of the buckel to insure the adjustability you will need with the buckel so it will not slip apart.
|
|
|
|
 |
|
 |
|
 |
|
|
After the initial body is complete starting with the arms and then legs I would once again make them tight and just barely a little longer than the facade piece itself as it is lying down flat and let the stretchiness go to near the max of what isit is reasonably capable of so that it is on tight an minimizes buckling appearance that can happen if the face fits over you and your undersuit too lossely. Just don't cut off the circulation.
|
|
You can get a good idea with out even measuring by simply running your arm through and checking as you are working. Try it on over your body a few times as you go to double check your progress and stop from making unforeseen errors that could cause you to have to redo the whole thing from the start.
|
|
Now for some people who are shorter and smaller than me at 6'3" and 2-5 pounds you will be wanting to take out a few inches under the belt before completing your strapping processs so that when you wear this it will look as good on you as it does on anyone else regardless of your shape and size. If you are 5'10" and not 6'3" that does not necesarily determine you should take away 5 inches because you are 5 inches shorter than me. There are other factors to consider first.
|
|
|
|
 |
|
 |
|
 |
|
|
|
If you want to get creative with your shape and seam lines or cut parts away and rearange now would be the time but I do not recommend this unless you have a good plan and some good art/ craft ability or special circumstances to consider. A straight cut is usually better for most shortening alterations for most people. I will not cut this piece because it already fits but go ahead and cut yours when you are sure you have it figured right. Remember, measure ten times cut once.
|
|
|
For instance you weight and body shape come into effect. I would carefully manupulate and remanipulate the suit on your body and maybe even have a helper stand by to advise and help mark and a full lentgth mirror is a great thing to have also. Once you determine how much needs to be taken out under the belt for it to fit right determine where the top of the belt will be on both you and on the facade and mark it.
|
|
Go down about an inch and a half from where you want the top of the belt to rest on the facade if you have a three inch belt for instance if you want the cut to be in the middle of the back of the belt in other words. So devide the belt width by half to determine how much lower than the top resting point of the belt on the facade to the top cut of the alteration will be Then mark with masking tape or marker and then make another mark the number of inches lower that you will be taking and lifting out and shortening the whole thing by.
|
|
|
|
 |
|
 |
|
 |
|
|
|
Again, make the cut in this type of manner only if you are going along with a detailed plan of doing a customization to fit your needs beyond just shortening the piece. Chances are you will know who you are if you are one of the ones who is gonna fool around with major alterations. Most should not. Save all cut parts and avoid cutting till you have the exact line drawn or taped that you want to cut, that way if you make mistakes you can sometimes correct by piecing back together. Doing that with 2 pieces is easier than 22 pieces.
|
|
|
|
I like to think of the design of anything I do as being functional and having meaning. Figure out what you are doing and why you are doing it before you act and you will have better chances of success if you create custome designs from existing pieces. Perhaps you want some of the under suit to show through in areas. This is where the customization in this way can come in for your needs.
|
|
|
|
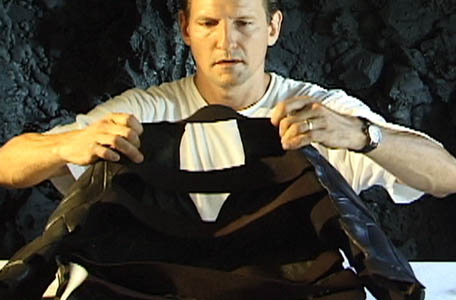
Make sure you attach a strap direcly at the bottom of your upper half and at the top of your lower half. Do not rely on the belt to hold the halves in place properly or for long. Sometimes I even velcro the two halves together or even superglue them if you know you will never want to use the facde as a two piece.
|
|
|
|
 |
|
 |
|
|
 |
|
|
|
Other alterations. The knee caps can be used or completely cut off and replaced or you may find they are completely unnesscary or work better for you as a separate piece. This is all up to you but I would go on a costuming gig or two as you fine tune your costume and do not worry and try to get everytihg right all ahead of time. Nothing teaches like experince and use and even failure.
|
|
|
|
After careful consideration you may decide to cut them off prior to attaching straps or after you have tried it first with them on. I find that there is always going to be some buckling in the knees when you bend them and there is nothing you can do except elliminate the knee caps all together or cut away the part that buckles and leave that area open for better expantion and contraction left to exposure of just the undersuit to be seen below the creices left after buckle removal.
|
|
|
|
Ok so the tops and middle and arms are done and maybe you took some out in the mid section below the belt. Move onto the legs now.
|
|
|
|
 |
|
|
|
 |
|
 |
|
|
|
If you use buckels, once again the shoulder area and the upper leg and butt areas are the best to implement them. You may even want to spend a few more bucks and do buckles all the way up the back but it is not nessacry it will just make it easier to get in and out of. Heck you could do an adjustable buckle for every single one if you wanted. A few areas it might be uncomfortable though ezpecially if you sit down. It is all your choice
|
|
There you go. You are about done. Just a few more things to consider to make it perfect and very easily usable for all time.
|
|
|
The legs are done the same way once again be sure to allow tightness and major stretch of the elastic. Make the legs straps just slightly longer than the piece itself if you are slender but hold it up to yourself and take a measuring tape or the elastic strap itself and mark with your finger or tape about how wide the first strap has to be. Then it is easier to judge for the next ones on the way down he leg. Do it symetrically 2 at a time and save measuring
|
|
|
|
 |
|
 |
|
|
|
 |
|
|
|
I am tall and this suit was made on my form even though it will work for practically anyone with alterations for shorter folks. Even for me I cut the neck line down a bit for comfort but if you are shorter you will definitely want to do this maybe even more because you are going to want to rais the breast up so it naturally falss on top of the correct place on your own chest and chances are the neck will get in the way if you do not cut it a bit lower as I have done here. You will never see it anyway if youu plan on wearing a cowl so why not be comfortable and not have it pushing on your adam's apple.
|
|
You will want to careflly slice holes in the approriate areas which can vary if you are attaching a light weight fabric cape. No holes are nesecary if you are wearing a cape over that has its own attachment device. For a light cape the latex tightness of the slit itself will be enough to hold the cape in place.
|
|
|
|
You will want a hole sliced on both sides in the areas indicated here but really when it comes down to it you can put them whereever you like and even add cape clips for different application and uses for each individual costume you may have.
|
|
|
|
 |
|
|
|
 |
|
 |
|
|
|
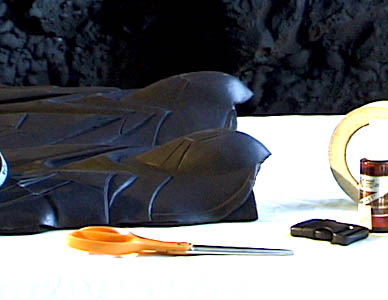
So there you are. It is done and ready to wear. You may store it on a mannequin which I will be creating shortly or use your own or you may hang it on a hanger if you plan your straps to accomodate one. Remeber the breast are going to hang low by gravity and it is up to you to design you r harness and strapping to hold them in the right place on your chest hgh enough to not look like a granny This is easily accomplishable by simple adjustment with strapping anf each use or application of your costume before you go out in public make sure it s right. I hoes my entire costuem down with soap and water after evrry use and sometime armorall it if i have already plastidipped it. Do not armor all if you think you may be spraying plastidip on it later. You can paint before or after the strapping process but it is easier befoer.
|
|
|
|
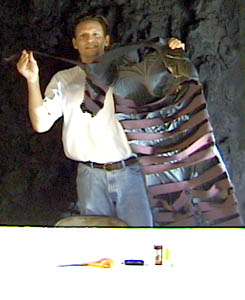
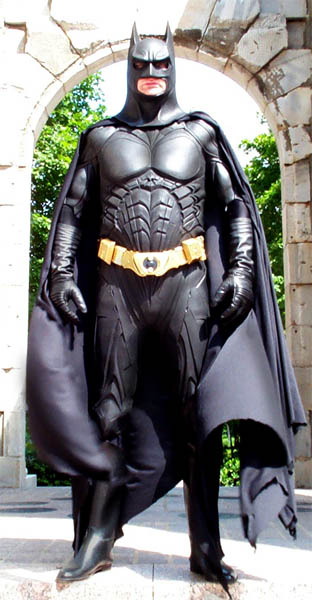
This particular piece shown with this tutorial looks like this when worn with this exact strap configuration shown here. In fact it is the same piece. Go at it. Have fun. The entire prcess took me like about an hour the first time but don't rush. If you do this right you will enjoy it your whole life and your minor efforts now will be well worth the many years of costuming that lie ahead as a believable suerhero.
|
|
|
|
|
|
|
|
|
|
I hope this tutorial helps you to accomplish your goal of creating a perfectly awesome and realistic suerhero suit. Remeber this is not going to give you super powers in any way even though you look ready for action. You are not bullet proof. Watch for crime but use the phone and let the proper athorities handle it and be a good citizen. A good citizen is one less crime creator out there and a good influence on others. Remember Crime does not Pay.
I am Paul Roberts. You can call me artsee1
It has been my pleasure to share with you what you need to know to have the time of your life costuming as a superhero. Have fun and ask questions if you have them. I am always here to help fellow enthuiasts
If you join my costuming messege board which you will find the link for on the main costuming page link below you will encounter a great bunch of people who have gone through some of the the same experinces as you while creating their costumes and they are eager to share and make friends because fun and sharing is what this hobby is all about and what makes it so great.
Chances are if you are attracted to superheros there is a hero within you and you may or may not already know that or believe that either way you are gonna find you are in good company on The Behind The Bat Messege board.
Pleased to make your aqauintaintances.
Happy costuming.
|
|
|
|
|
|
|
|
|
|
|
|
|
|
|
|
|
|
|
|
|
|
|
|
|
|
|
|
|
|
|
|
|
|
|
|
|
|
|
|
|
|
|
|
|
|
|
|
|
|
|
|
|
|
|
|
|
|
|
|
|
|
|
|
|
|
|
|
|
|
|
|
|
|
|
|
|
|
|
|
|
|
|
|
|
|
|
|
|
|
|
|
|
|
|
|
|
|
|
|
|
|
|
|
|
|